How Your Brakes Actually Work
Every time you press the brake pedal, a chain reaction converts your vehicle's forward momentum into heat - and that heat is what slows you down. Here is the sequence in plain terms:
- Pedal force pushes brake fluid through sealed hydraulic lines.
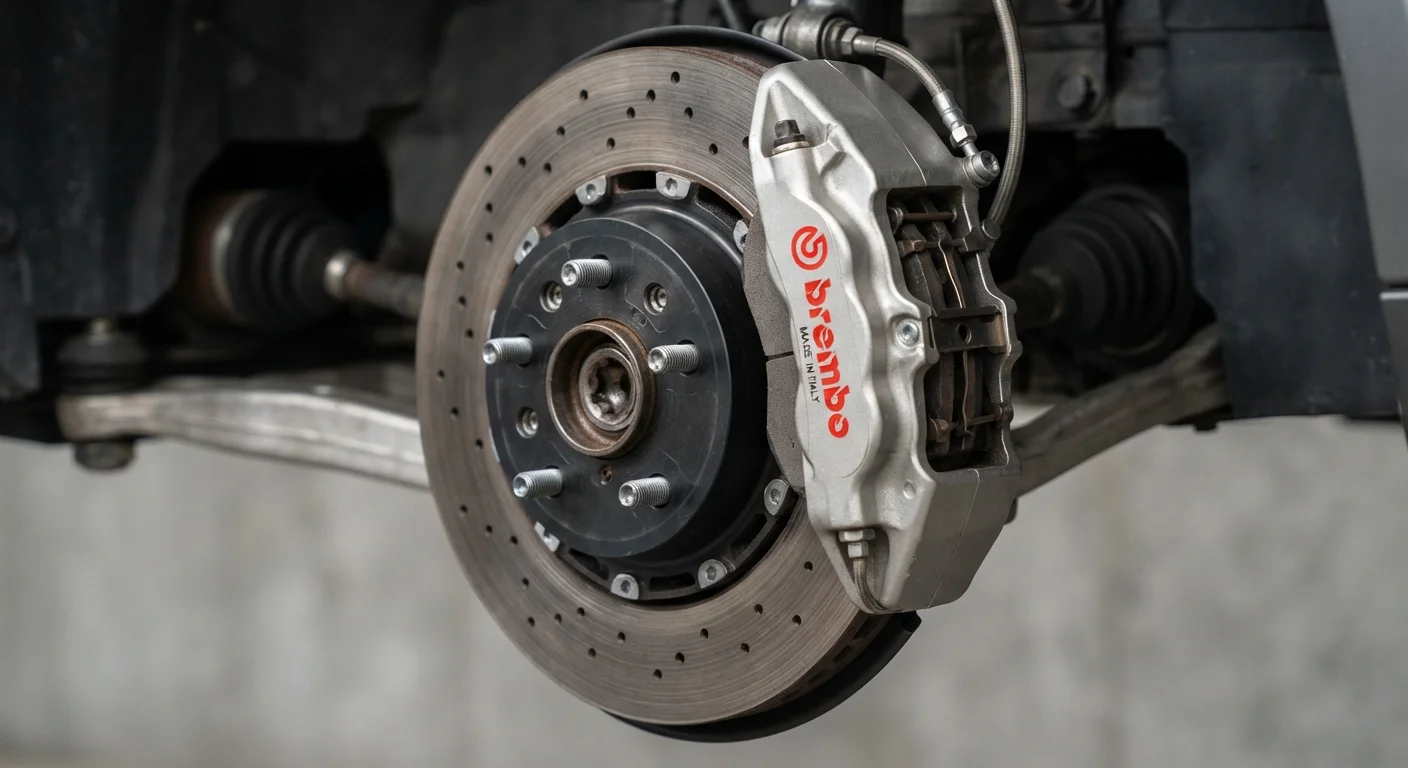
- That pressurized fluid activates a caliper - a clamp-like device straddling a spinning disc (the rotor).
- The caliper squeezes brake pads against both faces of the rotor, creating friction.
- Friction converts kinetic energy to heat, and the wheel slows.
Most modern passenger vehicles use disc brakes on all four wheels, though some entry-level and older models still use drum brakes on the rear axle. Drum brakes operate on a similar hydraulic principle but use curved shoes pressing outward against the inside of a drum rather than pads gripping a disc.
Understanding this system helps you appreciate why each component matters - and why letting one part fail puts stress on everything around it. For broader vehicle upkeep context, see your vehicle's maintenance schedule explained.
Brake caliper
A clamp-like device that squeezes the brake pads against the rotor when you press the pedal. It is activated by hydraulic brake fluid pressure.
Rotor
The large metal disc that spins with your wheel. Brake pads grip it to create the friction that slows the vehicle.
Brake pad
A replaceable friction block that presses against the rotor. It is designed to wear out gradually so the rotor is protected.
Brake fluid
A hydraulic liquid that transmits the force of your foot on the pedal to the calipers. It absorbs moisture over time and must be replaced periodically.
Brake fade
A temporary reduction in stopping power caused by excessive heat in the pads or fluid, often from prolonged or repeated heavy braking.
Wear indicator
A small metal tab built into most brake pads that contacts the rotor and produces a squealing noise when pad thickness is too low.
Brake Pads and Rotors: What They Do
Brake pads are the consumable friction material in your system. They are designed to wear down gradually so the more expensive rotor does not. A new pad is roughly half an inch thick; most manufacturers recommend replacement when thickness drops to about a quarter inch or less.
Rotors (also called brake discs) are the large metal discs your pads grip. They must dissipate enormous heat quickly, which is why you will notice ventilation slots or holes on performance-grade rotors. Rotors wear too - each pad application removes a tiny amount of metal - and they can also warp if overheated repeatedly, causing a pulsing sensation through the pedal.
The two parts are a matched system. Replacing pads on deeply grooved or warped rotors means the new pads will never seat properly, shortening their life and reducing stopping performance. A mechanic will measure rotor thickness with a micrometer; if it falls below the manufacturer's minimum spec, the rotor must be replaced, not just the pads.
Do a Quick Visual Check at Each Tire Rotation
Most technicians rotate tires every 5,000 to 7,500 miles - a perfect opportunity to inspect brake pad thickness and rotor surface condition at the same time. Simply ask your service provider to note pad thickness measurements in writing. Tracking that number over multiple visits gives you early warning before pads reach a critical level.
Warning Signs Your Brakes Need Attention
Your brakes communicate clearly when something is wrong. Learn to recognize these signals early:
- Squealing or high-pitched noise: Most pads include a metal wear indicator tab engineered to contact the rotor and squeal when pads get thin. Do not ignore a noise that occurs consistently on braking.
- Grinding: Metal-on-metal contact means pad material is gone. This will score the rotor quickly and turn an affordable pad swap into a more expensive repair.
- Pulsing or vibrating pedal: Often indicates a warped rotor. You may also feel it through the steering wheel.
- Longer stopping distances: If your car takes noticeably more distance to stop than it used to, have the system inspected promptly.
- Brake warning light: On most modern vehicles this light activates when fluid level drops or when an electronic wear sensor is triggered.
- Soft or spongy pedal: A pedal that travels closer to the floor than usual can signal air in the brake lines or a fluid leak - both require immediate professional attention.
Staying alert to these signals is part of the road safety habits worth building that keep every driver safer.
Never Ignore a Grinding Noise While Braking
Grinding means metal-on-metal contact is actively damaging your rotor with every stop. What might have been a straightforward pad replacement can escalate to a rotor replacement - sometimes on all four corners - if driving continues. Pull over safely when possible and arrange professional inspection before continuing to drive the vehicle.
Brake Fluid: The Overlooked Essential
Brake fluid (classified as DOT 3, DOT 4, or DOT 5.1 for most passenger vehicles) is hygroscopic - meaning it absorbs moisture from the air over time. As water content increases, the fluid's boiling point drops, making it more susceptible to brake fade under hard use. Most manufacturers recommend replacing brake fluid every two to three years regardless of mileage.
Checking the reservoir is something most drivers can do at home. The translucent plastic reservoir sits on top of the brake master cylinder under the hood, usually near the firewall on the driver's side. The fluid should be between the MIN and MAX lines and should appear clear to light amber. Dark, murky fluid is a sign it has absorbed significant moisture and needs flushing.
For a broader look at checking and topping off fluids safely, see our guide to checking your car's fluids at home. Never mix DOT fluid types unless your owner's manual specifically allows it, and always use the grade specified for your vehicle.
When to DIY and When to Call a Mechanic
Some brake tasks are within reach of a motivated, safety-conscious home mechanic. Others require professional tools and expertise. Here is a realistic breakdown:
Tasks most drivers can handle safely
- Checking brake fluid level and color through the reservoir window
- Visually inspecting pad thickness through wheel spokes with a flashlight
- Monitoring for the warning signs listed above and scheduling service promptly
Tasks that warrant a qualified mechanic
- Replacing brake pads and rotors (requires lifting the vehicle safely and compressing calipers)
- Flushing and replacing brake fluid (requires bleeding the system without introducing air)
- Diagnosing a soft pedal, brake pull, or ABS warning light
- Any repair involving brake lines, master cylinder, or ABS module
Brake work done incorrectly can result in partial or complete brake failure - a life-threatening outcome. If you are not confident in your mechanical ability or do not have the proper equipment, always defer to a licensed mechanic. The cost of professional brake service is consistently less than the cost of an accident caused by brake failure. For a full picture of what brake work costs relative to other recurring expenses, the article on ongoing maintenance costs most drivers underestimate provides useful context.
This article is for general informational and educational purposes only. It does not constitute professional mechanical or safety advice. Always consult a qualified, licensed mechanic for diagnosis and repair of your vehicle's braking system.